A Remodeler’s Guide to Canless Lighting in a Mid-Century Modern (MCM) Home
As we started renovating our mid-century modern home from the ground up, lighting quickly became a top priority. After years in a Chicago condo without overhead lighting, our move to Northern Michigan made the value of well-planned recessed lighting an exciting design opportunity to dive into. While I’ll always love a good lamp, thoughtful overhead lighting brings balance, clarity, and an instant sense of warmth — particularly on gray, low-light days.
Start with Intent (Always)
Every room in a home has a different job, and lighting should support that — not fight it.
The kitchen needed bright, functional lighting because it’s a true work space
Living areas and bedrooms needed something warmer and more relaxed
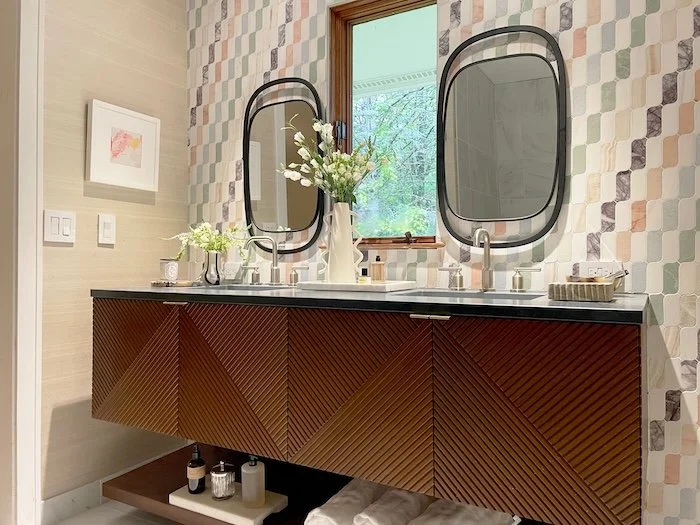
Bathrooms needed clarity without feeling harsh
And certain spots — sinks, beds, artwork, and our brick fireplace — needed intentional accent lighting
Starting with intent helped avoid over-lighting (or worse, under-lighting) and made every decision feel purposeful instead of random.
Recessed Lighting Layout: Where Function Meets Design
Once I knew what I wanted the lighting to do, I moved on to layout. I looked at ceiling height and room size, then used standard spacing guidelines to determine how many recessed lights were needed for general illumination.
From there, I layered in accent lighting where it made sense.
To keep everything clean and visually calm, I used a laser measure to make sure lights were perfectly aligned — especially in areas where they run in straight lines or frame architectural features. Every location was double-checked with a stud finder so there were no surprises hiding above the drywall.
It’s a little extra effort up front, but it makes a huge difference once the lights are on.
Why I Chose Elco Lighting (and the Koto Canless System)
Because this was a full remodel, flexibility was key. Elco Lighting stood out immediately because they offer solutions for both new construction and remodels — including traditional housings and canless recessed lighting.
Given our ceiling conditions, I chose Elco’s Koto canless LED system, which is designed specifically for remodel applications. It delivers strong light output, excellent color quality, and a clean, modern look — without requiring bulky housings in the ceiling.
From a design perspective, it also felt minimal and timeless, which is exactly what I wanted for our MCM home.
What Actually Makes Lighting “Good”
Modern lighting isn’t just about brightness. There are three key things that really matter:
Lumens — how bright the light is
Color temperature — how warm or cool it feels
CRI (Color Rendering Index) — how accurately colors appear
CRI turned out to be especially important. In a home with natural wood, tile, and warm finishes, low-quality lighting can make everything feel flat or off. I targeted 95+ CRI, which Elco offers across many of their products, so colors stay true, warm, and natural throughout the house.
Once you see the difference, it’s hard to unsee it.
Elco’s Modular System (A Remodeler’s Dream)
One of my favorite things about Elco’s system is how modular and straightforward it is. Each light consists of three parts:
The power pack — connects to standard residential power
The light module
The trim — the visible design detail that “frames” the light module
In most residential spaces, there’s very little reason to use 6″ recessed lights anymore. A 4″ trim provides beautiful general lighting, while 2″ lights are perfect for accents and focal points.
For this home, we used:
4″ lights for general lighting
2″ lights for accent and feature lighting
Everything was finished with round white trims for a clean, cohesive look. One bonus: for flat ceilings, the power pack and light module stay the same — only the trim size changes between 2″ and 4″. That made ordering and installation much simpler, but was not intuitive (at least for me)!
Dimmers Are Not Optional
Lighting design doesn’t stop once the fixtures are installed. Nearly all of our Elco lights are dimmable, and choosing the right dimmers is just as important as choosing the lights themselves.
Elco provides a dimmer compatibility list, which helps avoid flickering or jumpy behavior. Using the correct dimmers ensures smooth control from a soft glow to full brightness — especially important in living spaces and bedrooms.
Trust me, this step matters.
Installation Overview (Simpler Than You’d Expect)
With planning complete, installation was refreshingly straightforward:
Finalize placement using layout marks
Drill pilot holes after confirming no obstructions
Cut ceiling holes with the appropriate hole saw
! Run wiring from the attic with power turned off at the breaker ! This step is crucial, if you do not turn off the power prior to installation, you can easily ruin both the light module and your dimmer. I learned this the hard way so you wouldn’t have to!
Elco’s power packs make wiring simple with clearly labeled, color-coded connections. I also recommend adding a cable clamp for strain relief, even though it’s not included.
Once wired, the light module twists into place, snaps into the trim with spring clips, and pushes cleanly into the ceiling. Clean, secure, and done.
Final Thoughts
Choosing Elco allowed us to design lighting around how we actually live — not around construction limitations. The flexibility, color quality, and clean installation made it one of the most satisfying decisions in this renovation.
If you’re remodeling and want modern recessed lighting that feels intentional, polished, and livable, Elco’s canless Koto system is absolutely worth considering.
My Lighting Shopping List
Here’s the lighting setup we used throughout our remodel. (I’ll update this section with direct links so readers easily source the same products if they’re planning a renovation or lighting glow-up!)
(Links coming soon)
Elco Koto Canless LED Light Module – 4″
Used for general lighting in kitchens, living areas, bedrooms, and hallwaysElco Koto Canless LED Light Module – 2″
Used for accent lighting, artwork, architectural features, and focal pointsElco Power Packs (Canless Driver)
Compatible with standard residential wiringRound White Trims (2″ and 4″)
Clean, minimal finish for a cohesive look throughout the houseCompatible LED Dimmers
Selected from Elco’s dimmer compatibility list for smooth, flicker-free controlCable Clamps
Drill Attachment (for cutting the ceiling holes)